Principal, JWC Academy · 10th Place, 2017 World Latte Art Championship · 3× Malaysia Latte Art Champion
6 min read · Updated Jul 2026 · Bukit Jalil · Kajang · Mount Austin
Answer firstLatte art comes down to three moves: flow, height and wiggle. The prerequisite is glossy microfoam (pour within 10 seconds of steaming). The core mantra: integrate first, then draw. Pour high with a thin stream to mix the milk into the coffee (fill to about 60%), then drop low and close to the surface and wiggle, and the pattern surfaces. Controlling latte art is really controlling where the white goes.
Latte Art Mechanics · physics + parameters + technique
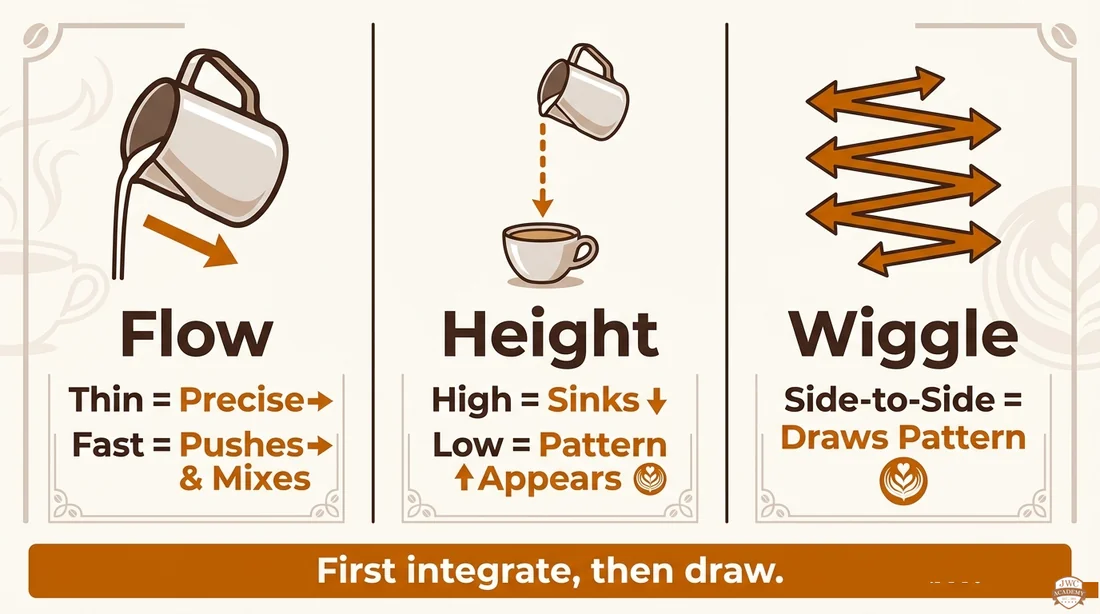
The three elements
Flow: thin = precise and slow; fast = pushes the milk and mixes. Height: high = milk sinks in (integrate); low = milk floats (pattern shows). Wiggle: side to side draws leaves and lines. Remember the order: integrate first, then draw.
Flow · Height · Wiggle
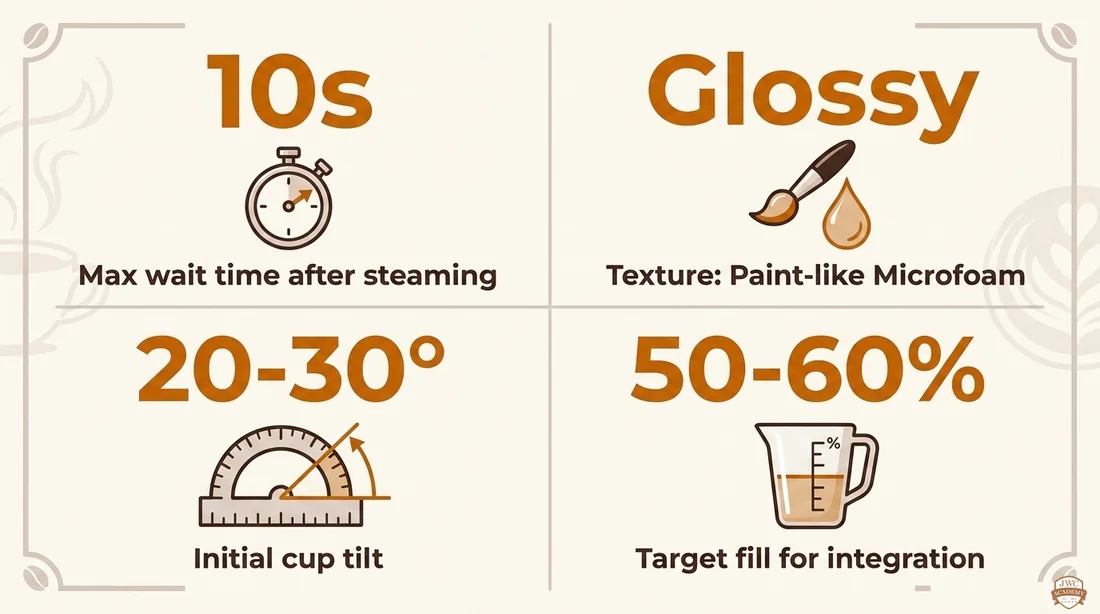
The key numbers
A few numbers that cut down failures: pour within 10 seconds of steaming (foam separates if you wait); the foam must be glossy, paint-like; tilt the cup 20–30° before pouring; fill to about 50–60% to integrate before you start drawing.
Under 10s
pour right after steaming
Glossy
paint-like microfoam
20–30°
initial cup tilt
50–60%
fill to integrate
10s · glossy · 20–30° · 50–60%
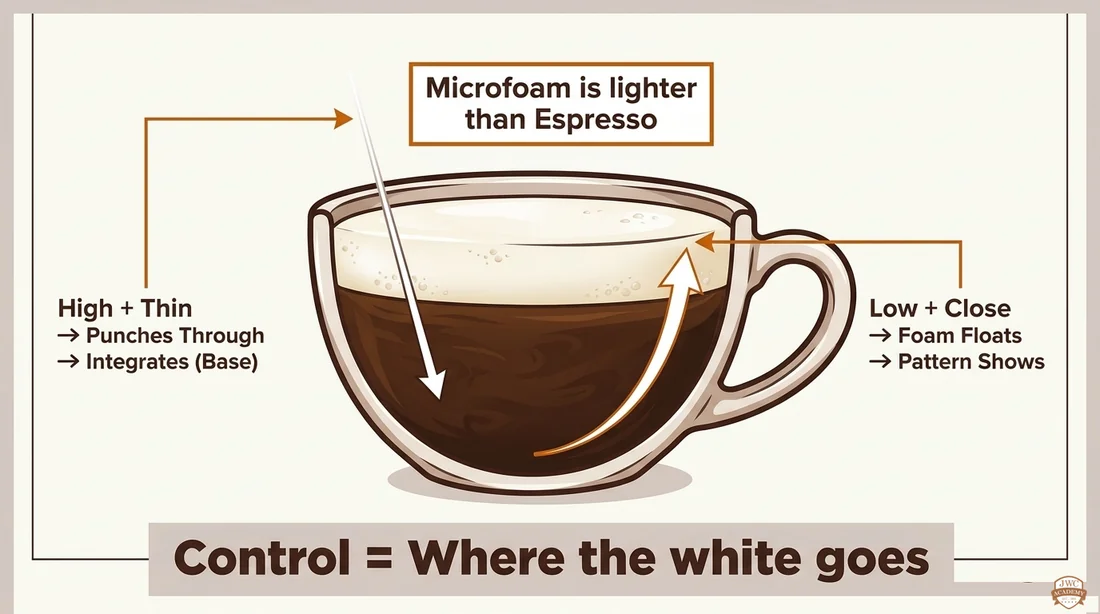
Where the white goes
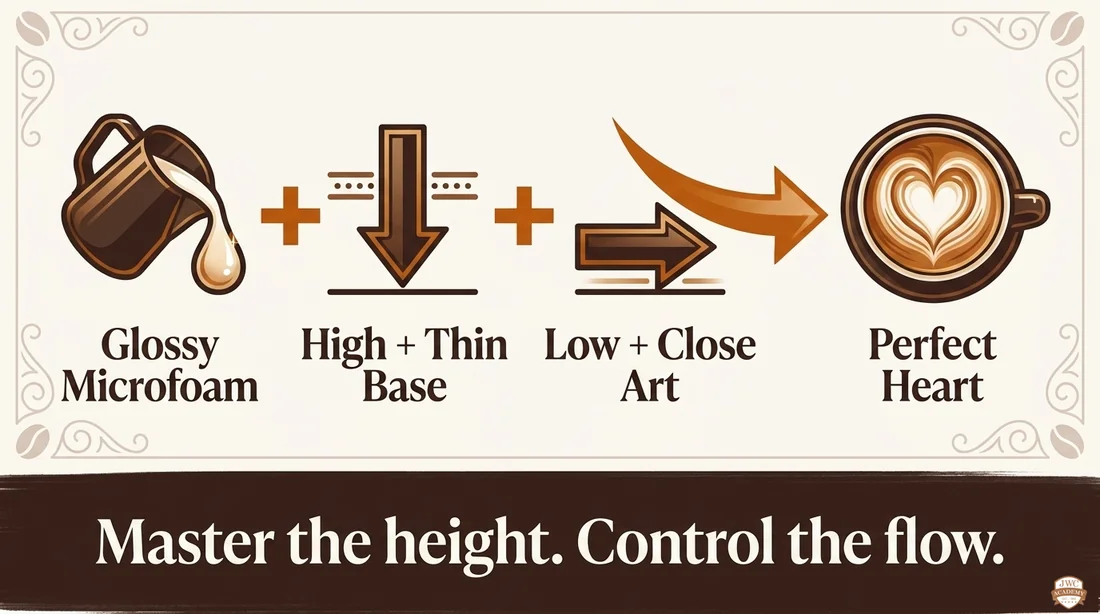
The physics is one line: microfoam is lighter than espresso. So a high, thin stream punches through the surface and carries milk to the bottom (integration); pouring low and close, the foam floats and the pattern appears. Grasp that, and you control where the white goes.
High + thin → punches in to integrate Low + close → foam floats, pattern shows
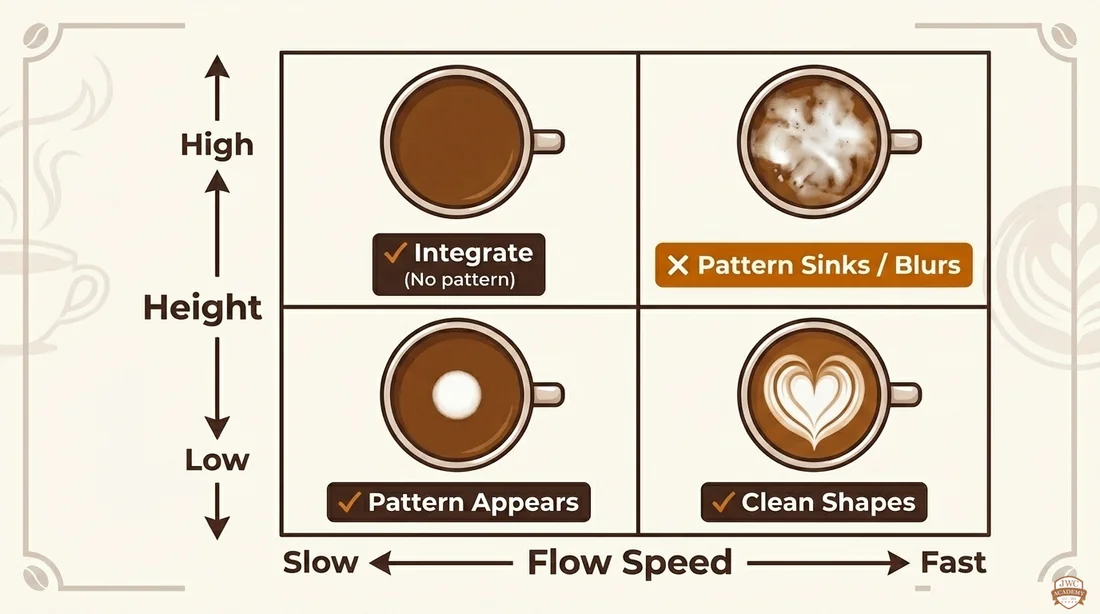
The height × flow matrix
Pair height and flow and you know what happens: high → integrate (no pattern); high + fast → pattern sinks or blurs; low + slow → pattern appears; low + steady → clean shapes. Stay in the “low” band for the drawing phase.
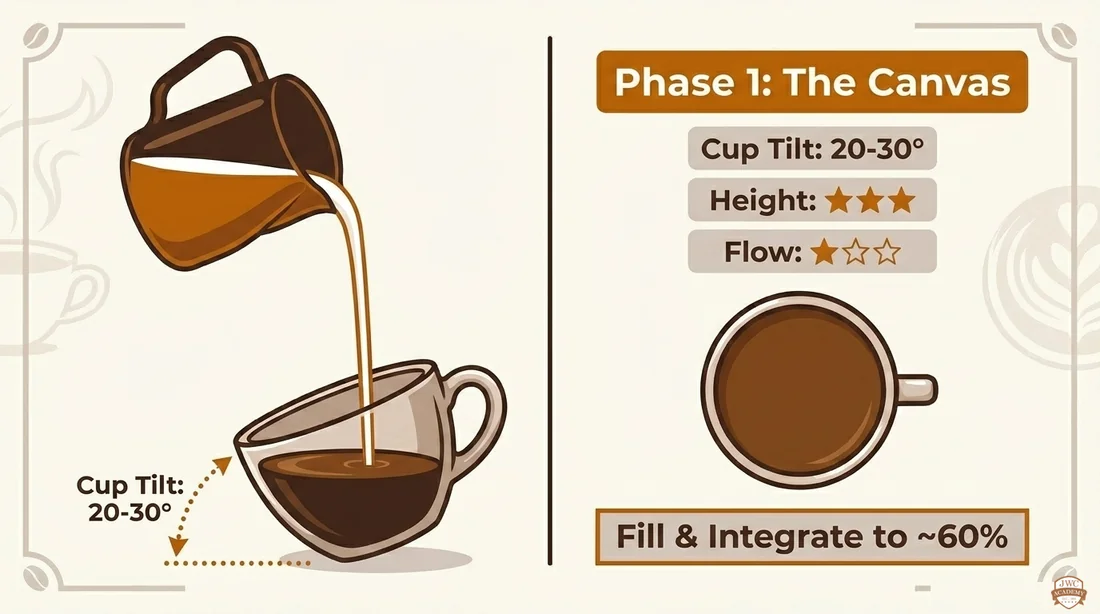
The canvas (integrate) tilt 20–30°, pour high and thin, fill to about 60% and integrate.
2
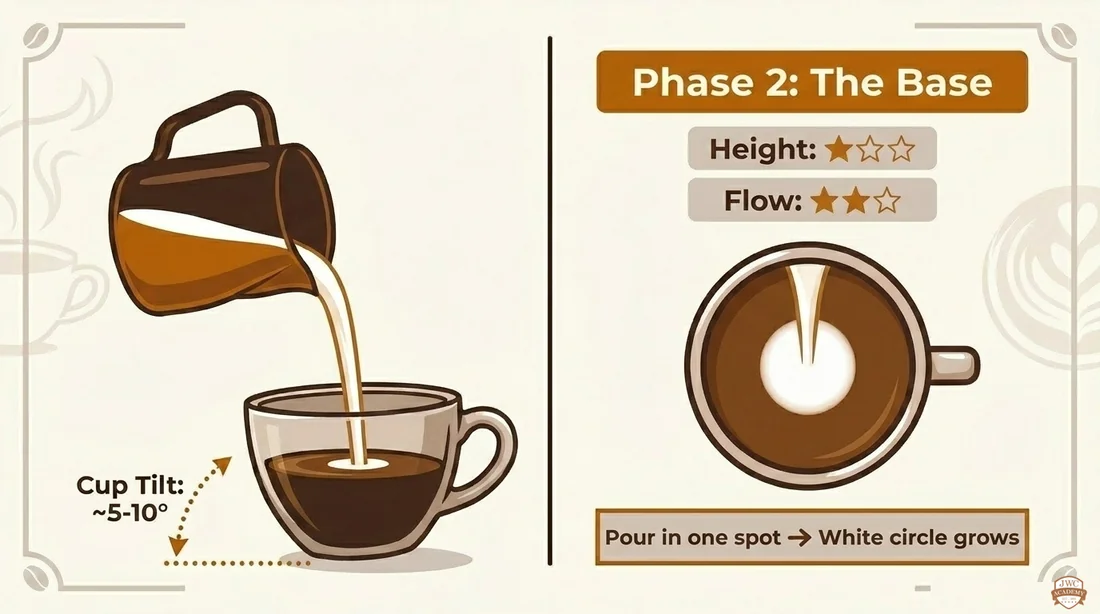
The base drop the height, pour steadily in one spot, and the white circle grows.
3
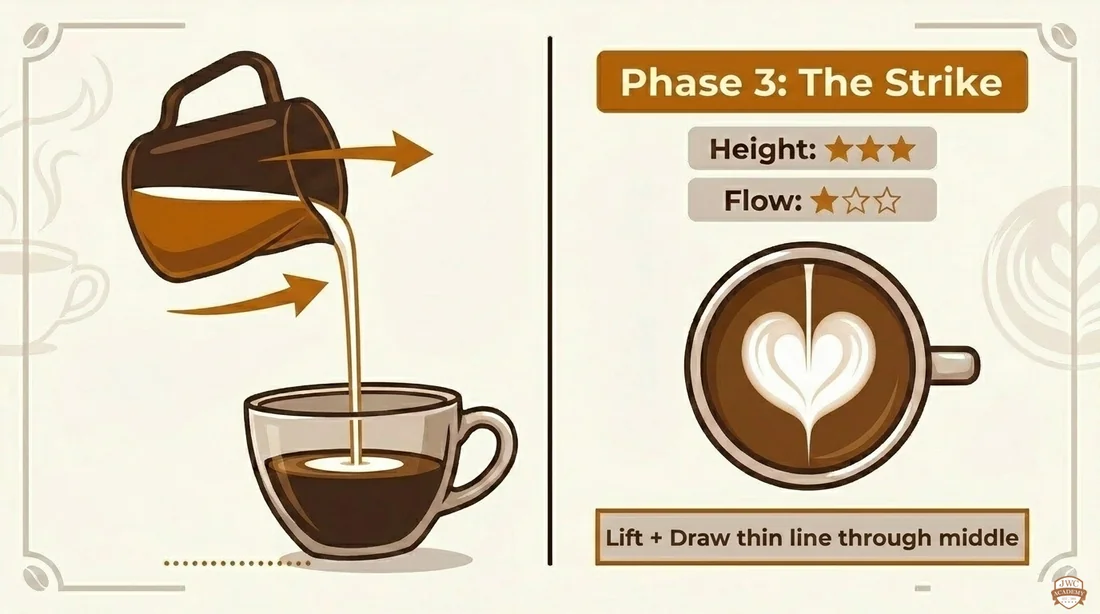
The strike lift and draw a thin line through the middle to finish a leaf or heart.
Phase 1 canvas: tilt 20–30°, integrate to ~60%
Phase 2 base: drop low, pour in one spot, white grows
Phase 3 strike: lift, draw a thin line through the middle
· · ·
Troubleshooting
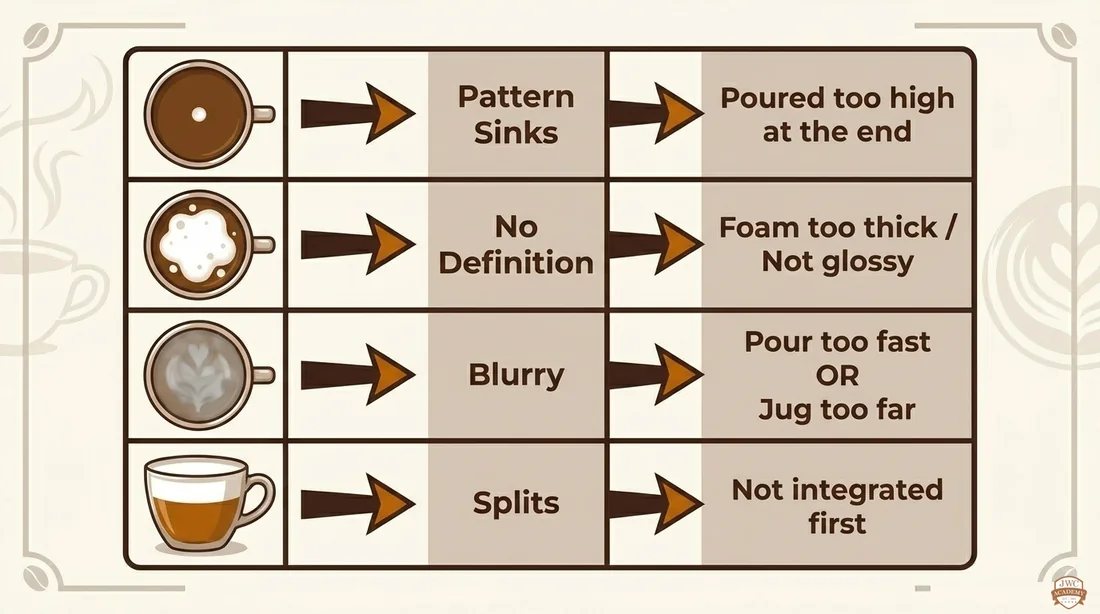
Match your problem: pattern sinks → poured too high at the end; no definition → foam too thick or not glossy; blurry → poured too fast or the jug too far; splits → not integrated at the start.
Sinks / no definition / blurry / splits and their causes
Remember it in one line
Glossy microfoam + a high-thin integrated base + low-close drawing = a beautiful heart. The core: master the height, control the flow.
Master the height · control the flow
Latte art is the most feel-driven skill, no amount of diagrams replaces real reps. JWC classes take you hands-on from integration to the strike.
FAQ
What are the three elements of latte art?
Flow, height and wiggle. Flow controls precision and mixing, height controls whether foam sinks or floats to show a pattern, and the side-to-side wiggle draws the shape.
Why does my art sink or blur?
Usually you poured too high at the end (foam sank), the foam wasn’t glossy, or you poured too fast or from too far. Integrate first, then pour low and close.
What milk texture do I need?
Glossy, paint-like microfoam poured within about 10 seconds of steaming. Lumpy or dull foam won’t hold a clean pattern.
Which pattern should I learn first?
Practise integration and a steady white circle first, then learn the strike for a heart. That’s the most solid order.
Master the pour
Want to go from “no pattern” to a clean heart?
Foam, integration and the three-phase pour, hands-on with a mentor · from RM199 · real machines